1. Sign in and choose your password
Your welcome email has your address (yourbusiness.varisett.com) and a temporary password. Sign in, and you'll be asked to choose your own password straight away.
Recommended: turn on two-step sign-in. Open your own profile (your name at the top), then press Set up two-step sign-in and scan the code with an authenticator app on your phone (Google Authenticator, Microsoft Authenticator or similar). After that, signing in asks for the 6-digit code from the app as well as your password, so a stolen password isn't enough.
2. Put your brand on it
- Open Setup → Branding.
- Enter your company name, upload your logo and choose your panel colour.
- Save. Every page, and every other Varisett platform you have, picks it up.
3. Company settings
Setup → Company settings is where you make the system speak your language.
- Tier display labels: rename the permission levels to your own job titles (for example "Supervisor" instead of "line manager"). The access underneath doesn't change.
- Department label: what you call your groups of people, such as sites, contracts or departments. It says "Department" until you change it.
- Weekly brief: switch on the summary that tells managers what's overdue in their team, and how often it comes (in days). It arrives in their notifications, under the bell.
- Timezone and the name your emails come from.
4. Set up departments
Departments are how people are grouped: by site, contract or department, under whatever name you chose above. Managers see the departments they look after, so set these up before adding people.
- Open Setup → Departments (it takes the name you chose).
- Add each one with a short code and a name.
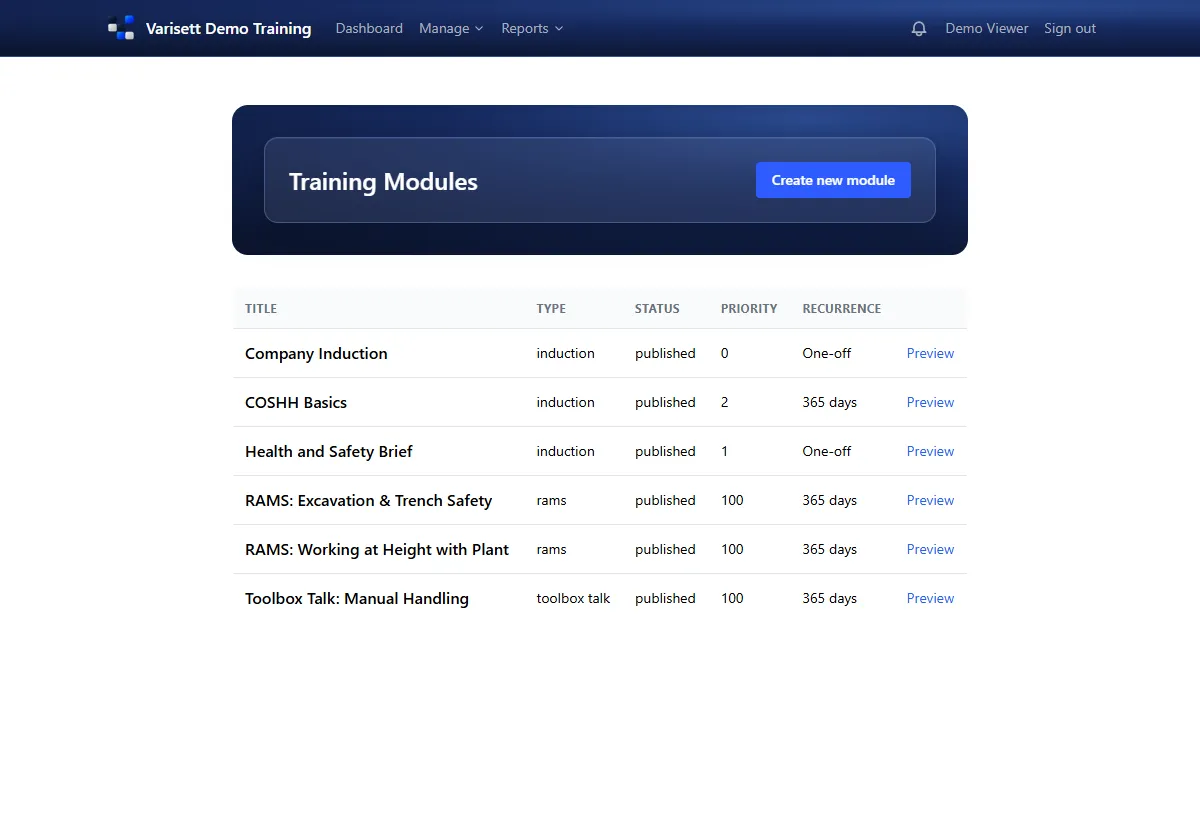
5. Build the training (or ask an admin to)
Training is built in three parts. The admin guide covers each in detail.
- Modules: each piece of training, as a video, a PDF or text, with an optional quiz.
- Certification types: the licences and certificates you track, and how often they're renewed.
- Job roles: which modules each role needs. Give a person a role and they get its training.
6. Add your people
- Open People → Add new starter.
- Enter their name and email, choose their department, tick their job roles and choose their permission level.
- Create the account. They're emailed a link to choose their password and sign in.
- Lots of people, or moving from another system? People → Import from a spreadsheet (admins). Download the people template and the certificates template, fill them in, and upload each one. You see every row first (who's added, who's already there, anything that needs fixing) and nothing changes until you press Import. Then use Send invitations when you're ready.
Good to know: You can give someone a permission level up to your own, never above it.
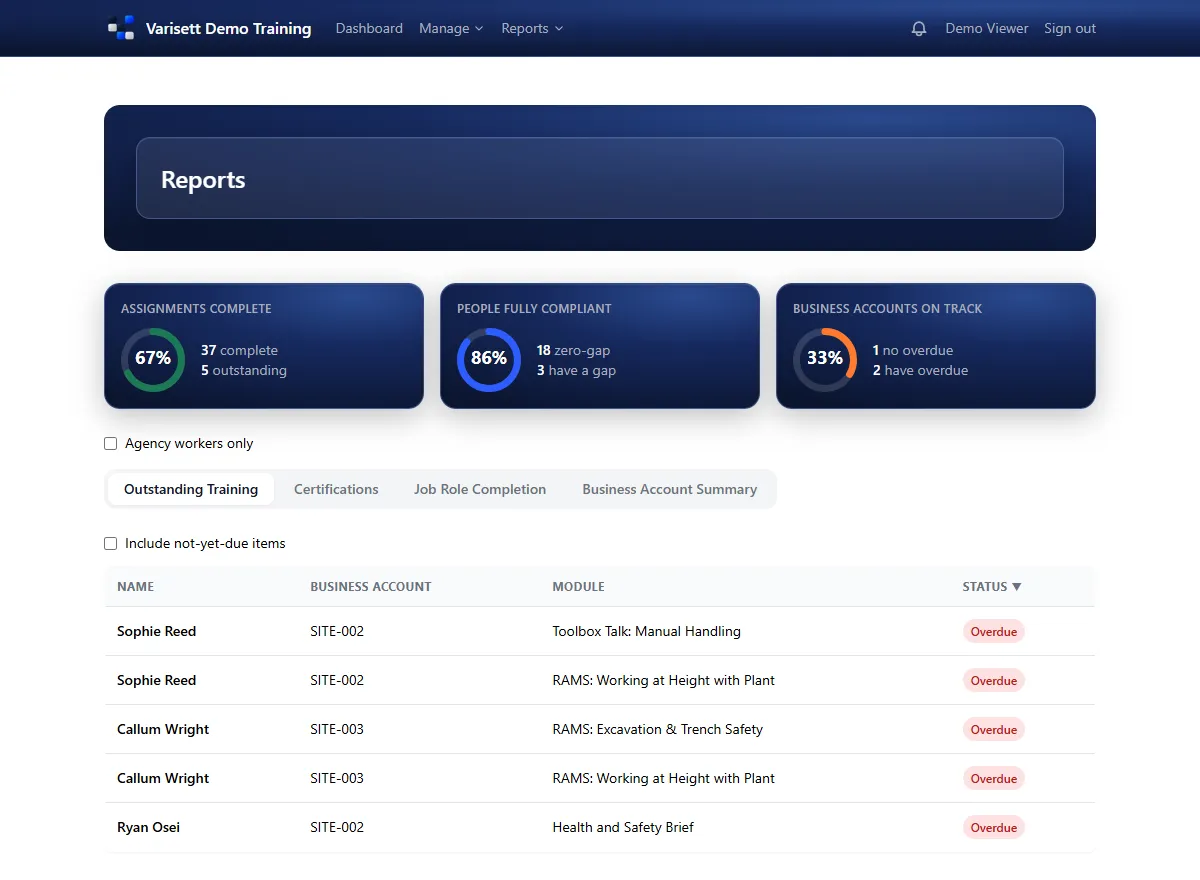
7. See where you stand
Reports show how much assigned training is complete, who has a gap, and every overdue item. The skills matrix shows everyone against every role's training.
When someone leaves
Open their record from People → My team and choose Mark as leaver. Their history stays for your records; they can no longer sign in.
If they also use your other Varisett platforms with the same sign-in, they're marked as left on those too. A director of those platforms can undo it under Team logins.
Your billing account
Plans, invoices and adding another platform are on varisett.com/account, signed in with the same email. That account is separate from your LMS sign-in, so you can give billing access to someone without giving them the LMS, or the other way round.
Screens show the real Varisett LMS with made-up example data. Your own system carries your name, logo and colour.